4 inch screen
Announcement
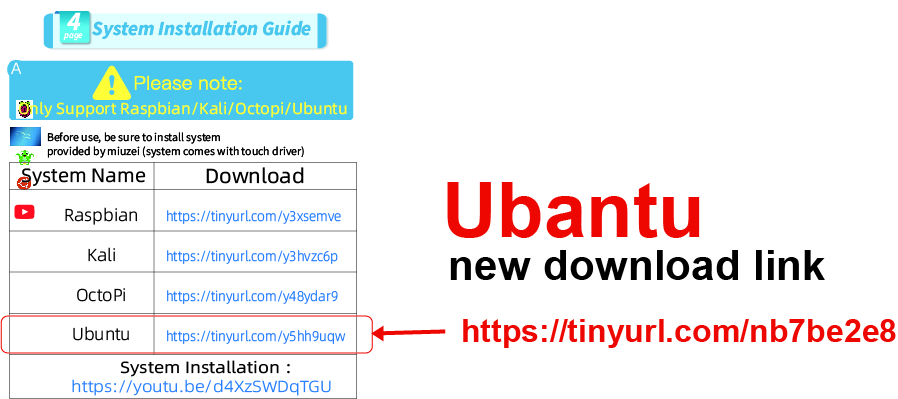
refer to :https://tinyurl.com/nb7be2e8
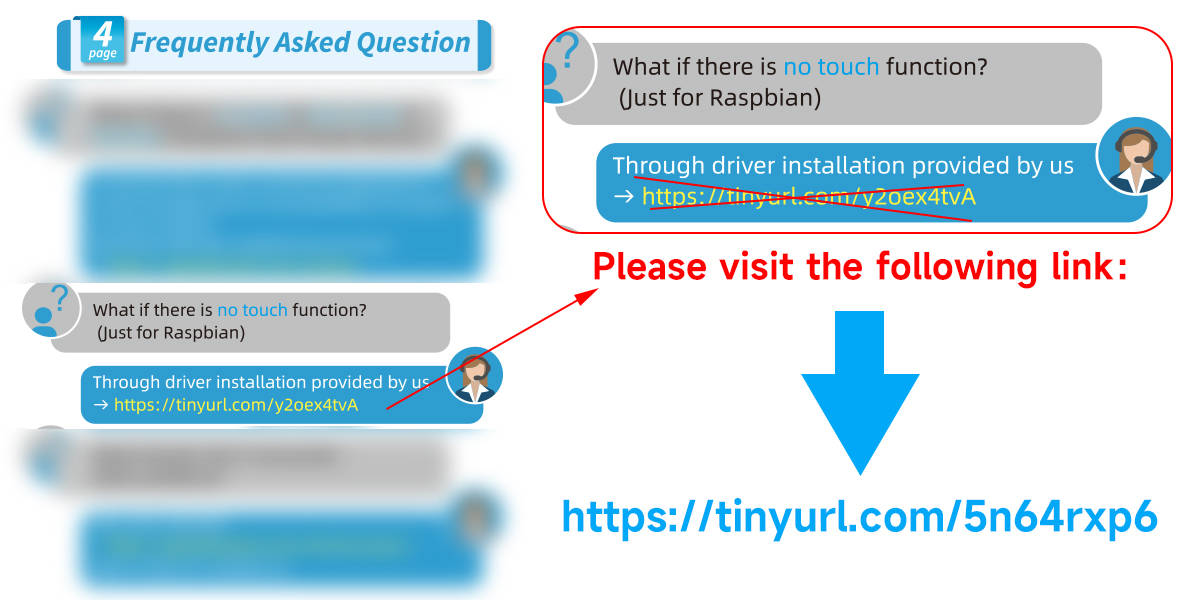
refer to :https://tinyurl.com/5n64rxp6
Product Description
- 4.0-inch IPS full-angle display, support HDMI input, refresh rate up to 60FPS
- The physical resolution is 800x480
- Raspberry Pi monitor with touch control (need to install touch driver)
- It can be used as standard HDMI output device for computer display(no touch function)
- Compatible with and can be directly inserted into all versions of raspberry PI motherboards (raspberry PI 1 generation B and Zero need additional HDMI cable)
- Support HDMI audio output, backlight brightness adjustable
Product Parameters
| Screen Size | 4.0inch |
| LCD type | TFT IPS |
| Moudule Interface | HDMI |
| Resolution | 800*480 (Pixel) |
| Active Area | 51.84x86.40(mm) |
| Touch Screen Controller | XPT2046 |
| LCD Driver IC | NT35510 |
| Backlight | LED |
| power consumption | 0.16A*5V |
| Working temperature(℃) | -20~60℃ |
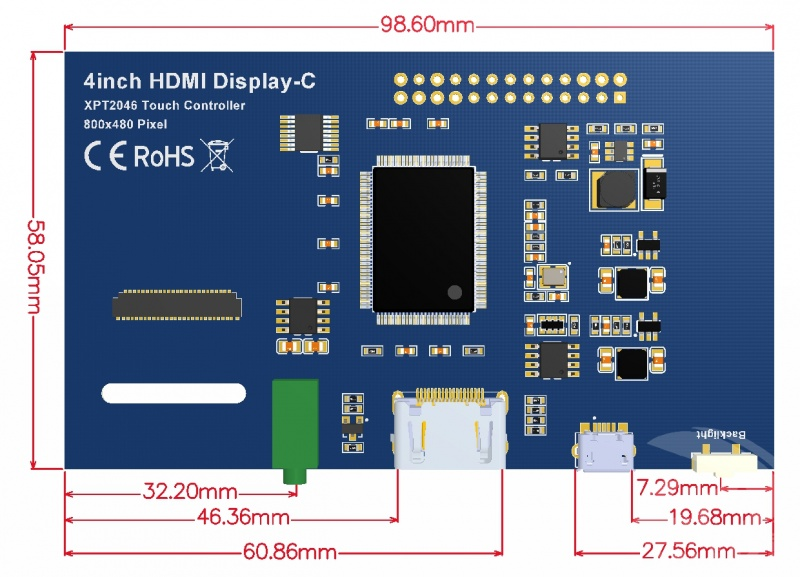
| Module PCB Size | 98.60*58.05 (mm) |
| Package Size | 143*134*51 (mm) |
| Rough Weight(Package containing)(g) | 126 (g) |
Hardware Description
13*2 Pin Socket interface definition:
| Pin | Name | Description |
|---|---|---|
| 1、17 | 3.3V | Power supply +3.3V |
| 2、4 | 5V | Power supply +5V |
| 3、5、7、8、10、11、12、13、15、16、18、24 | NC | NC |
| 6、9、14、20、25 | GND | GND |
| 19 | TP_SI | SPI data input of touch panel |
| 21 | TP_SO | SPI data output of touch panel |
| 22 | TP_IRQ | The touch panel is interrupted and the low level is detected when the touch panel is pressed down |
| 23 | TP_SCK | Touch the SPI clock signal of the panel |
| 26 | TP_CS | Touch panel select signal, low level select touch panel |
Size:
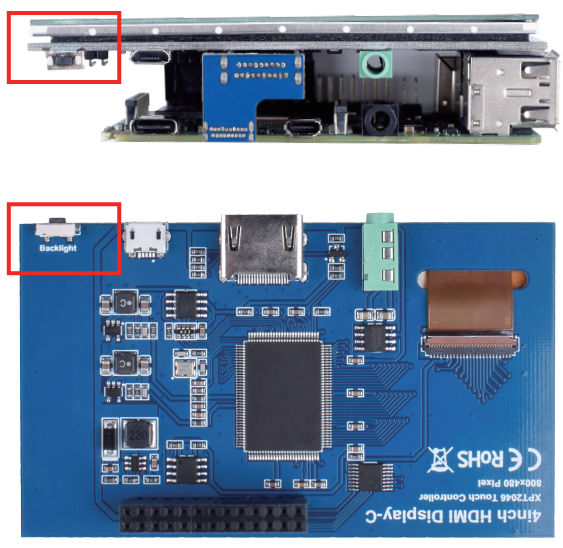
Screen Button Function ( Backlight Off)
How to install Raspbian/Ubuntu Mate/Kali/Octopi system(With Touch)
Highly recommend
Please Try our Configned images for tested. Just need download and write the image into the Micro SD card. DO NOT need any driver installation steps.
This Method is applicable to Raspbian/Kali/Octopi and Ubantu system.
- Image Download
Method 1 Use the image of the driver preinstalled
1) Download the driver image file from the website below: (image of the driver preinstalled)
2) Format Micro SD card by SD Formatter software
3) Burn the official image into Micro SD card by using BalenaEtcher software.
4) Insert Micro SD card, connect LCD, start Raspberry Pi, and it will work normally.
| Image Name | Version | Support | Password | Download | Update | |
|---|---|---|---|---|---|---|
| Raspbian | 2022-04-04 | PI4/PI3B+/PI3/PI2/
PI1/ZERO/ZERO W |
user:pi
password:raspberry |
Mega | https://tinyurl.com/y3xsemve | |
| Kali Linux RaspberryPi 2, 3 and 4 | 2021-09 | PI4B,PI3B+,PI3,PI2 | user:kali
password:kali |
Mega | https://tinyurl.com/y3hvzc6p | MPI4008-4inch-kali-linux-2021.3 |
| OctoPi | 0.18.0 | Pi4,Pi3B+,Pi3,Pi2 | user:pi
password:raspberry |
Mega | https://tinyurl.com/y48ydar9 | System update download |
| Ubuntu MATE | 22-04-01-32bit | PI4,PI3B+,PI3B | user:pi
password:raspberry |
Mega | https://tinyurl.com/nb7be2e8 |
Installation guidance video:https://youtu.be/29yw9LO06uc
Method 2 -Important:(This method is feasible only for Rasbain system)
Step 1 : Install the latest official images of various systems
(1) Download from the official website
Raspbian:https://www.raspberrypi.com/software/
(2) Format Micro SD card by SD Formatter software
(3) Burn the official image into Micro SD card by using BalenaEtcher software
Step 2: Connect to Raspberry Pi
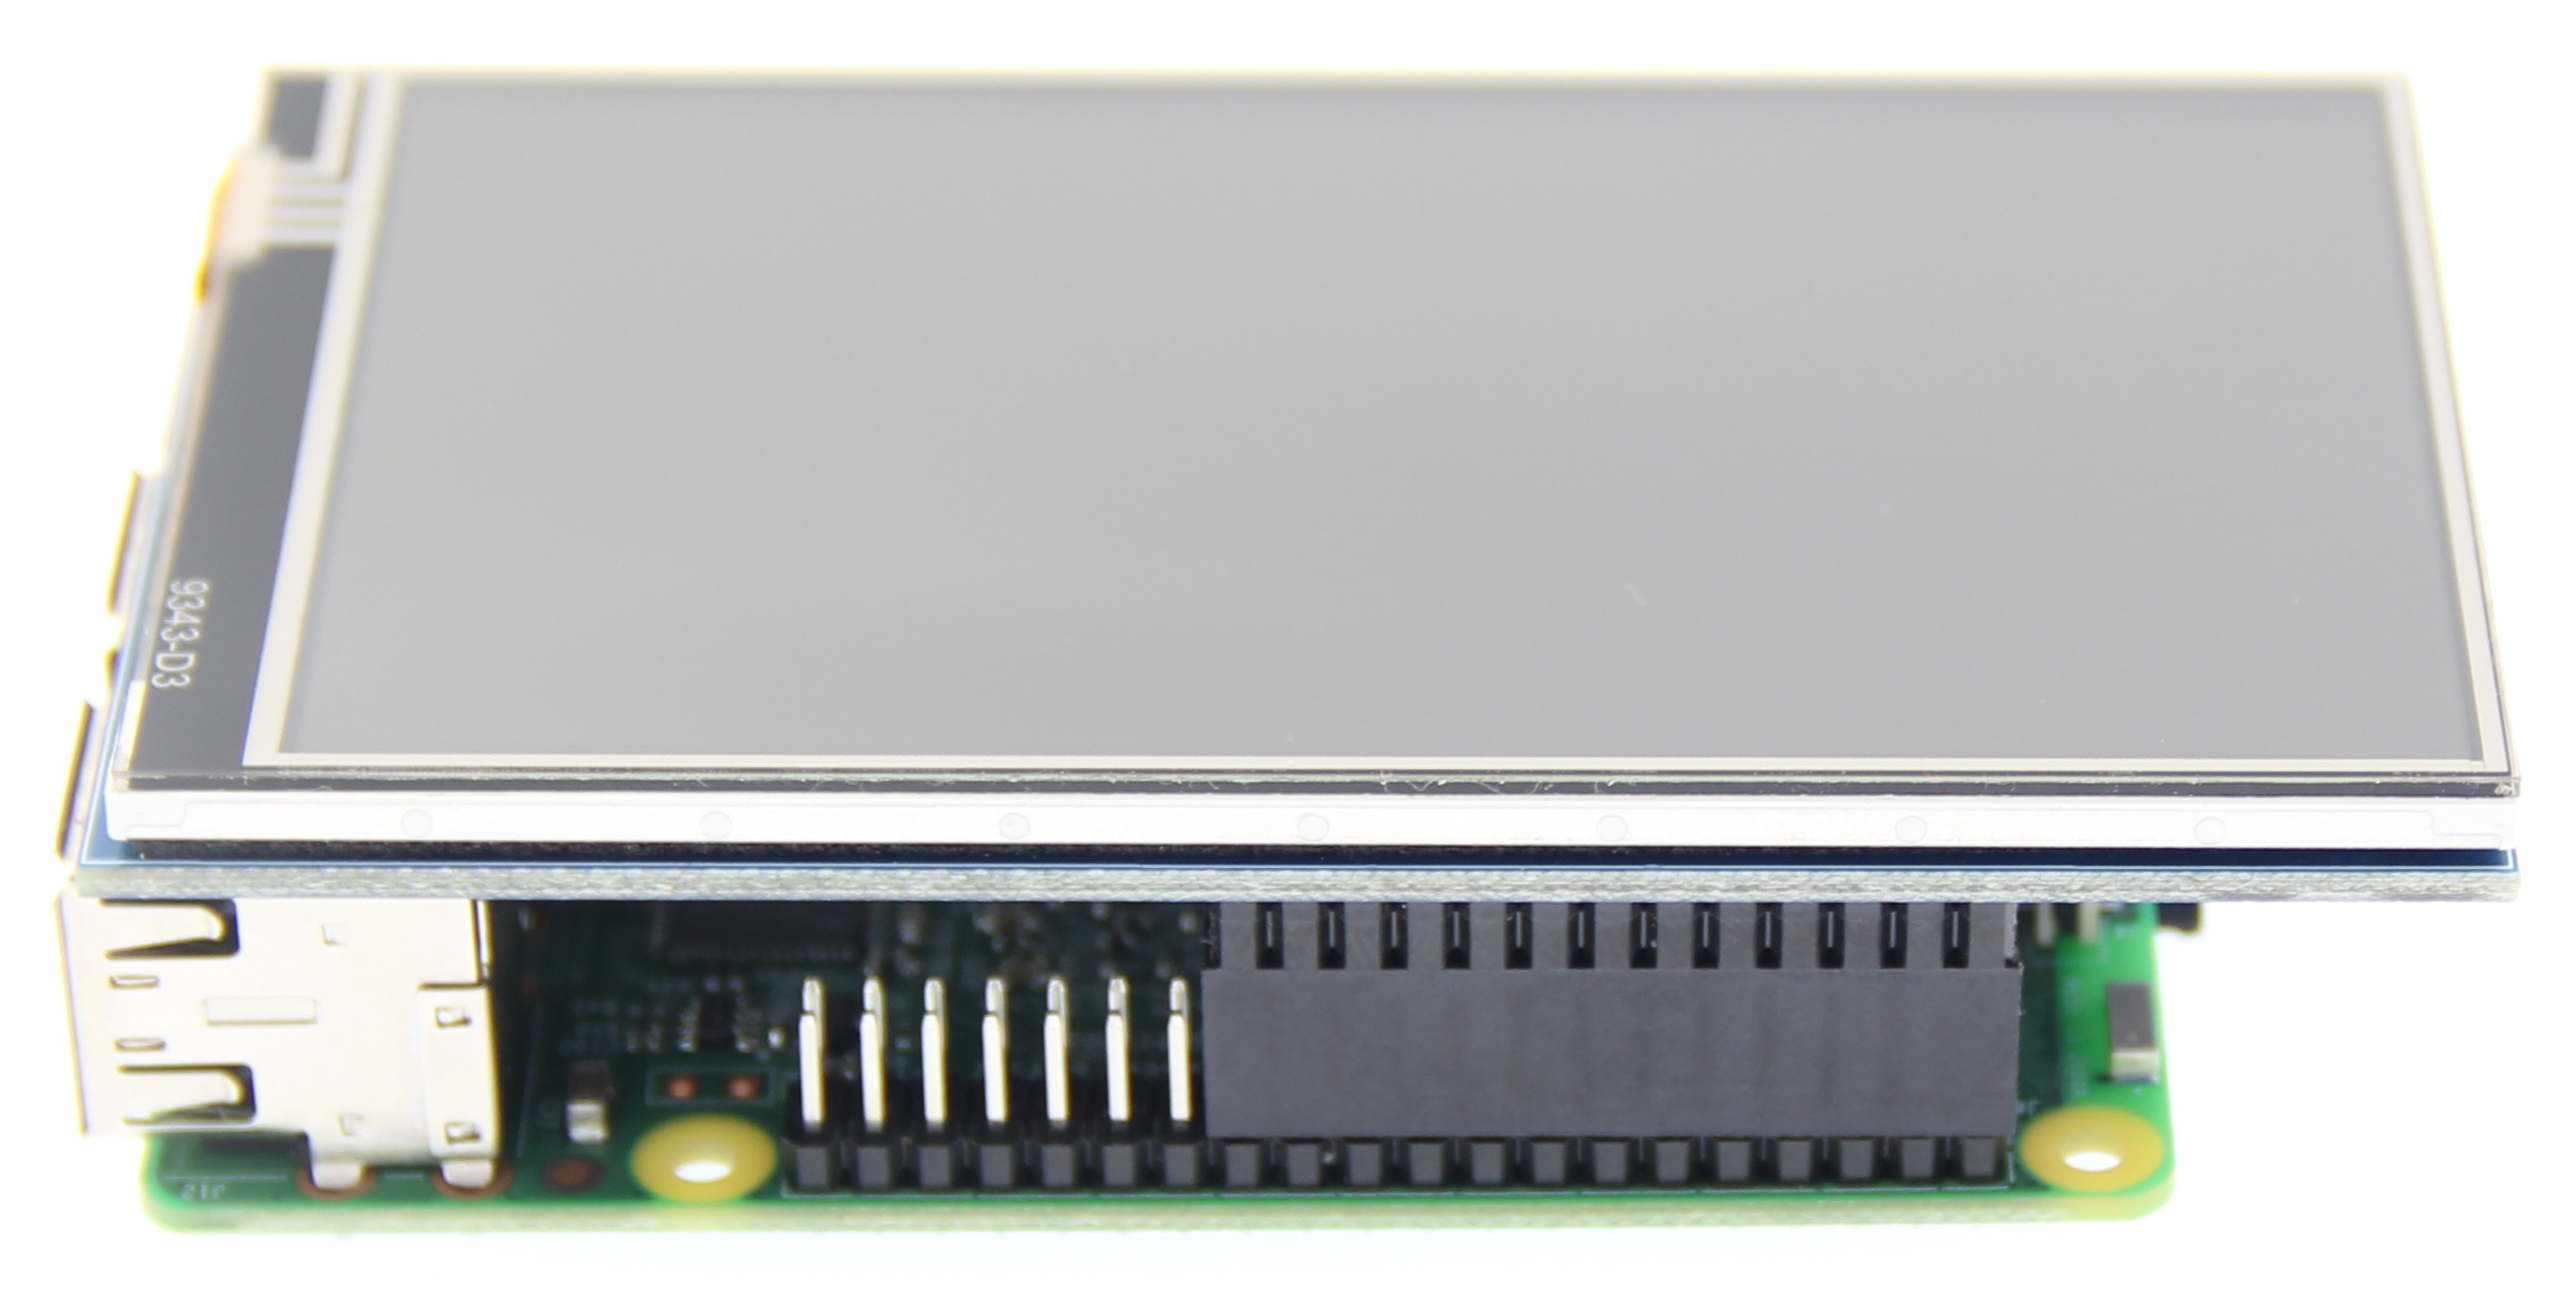
As shown in the figure, connect the LCD module to the Raspberry Pi
Step 3:Install the LCD driver
Method A:
Offline installation
Download from the web site or copy the "lcd-show.tar.gz" drive from the CD-ROM to the root
1)directory of the Raspberry Pi system card;
(Suggestion: copy flash driver directly to Micro SD card after completion of Step 1)
2) Unzip and extract drive files as the following command :
Run the following command line
| cd /boot
sudo tar zxvf LCD-show.tar.gz cd LCD-show/ sudo ./MPI4008-show |
3) Wait for a moment after executing, you can use the LCD.
Method B:
Online installation
Install drivers in the Raspbian system (Raspberry Pi requires Internet connection) --Q:SSH can not connect?https://tinyurl.com/55hkyemy
(1) Log on to the Raspberry Pi by Putty SSH (User: pi; Password: raspberry)
(2) Execute the following command (copy and paste it by right-clicking on the Putty window):
Get the newest driver from GitHub(Raspberry Pi LCD should be connected to internet)
Tips: Please note case of letters, spaces and special symbols
| sudo rm -rf LCD-show
git clone https://github.com/goodtft/LCD-show.git chmod -R 755 LCD-show cd LCD-show/ sudo ./MPI4008-show |
Step 4:Check whether the driver is installed successfully
After the installation of the LCD driver is completed, the system will restart automatically. If the LCD can be normally displayed and touched, the installation of the driver is successful.
Download Resources
- Common Software
1. SD Formatter https://tinyurl.com/4dx6dpyz
2. Putty https://tinyurl.com/3cdwmc52
3. Burn software-BalenaEtcher https://tinyurl.com/3sfpas6v
Other Tutorials(*Important*)
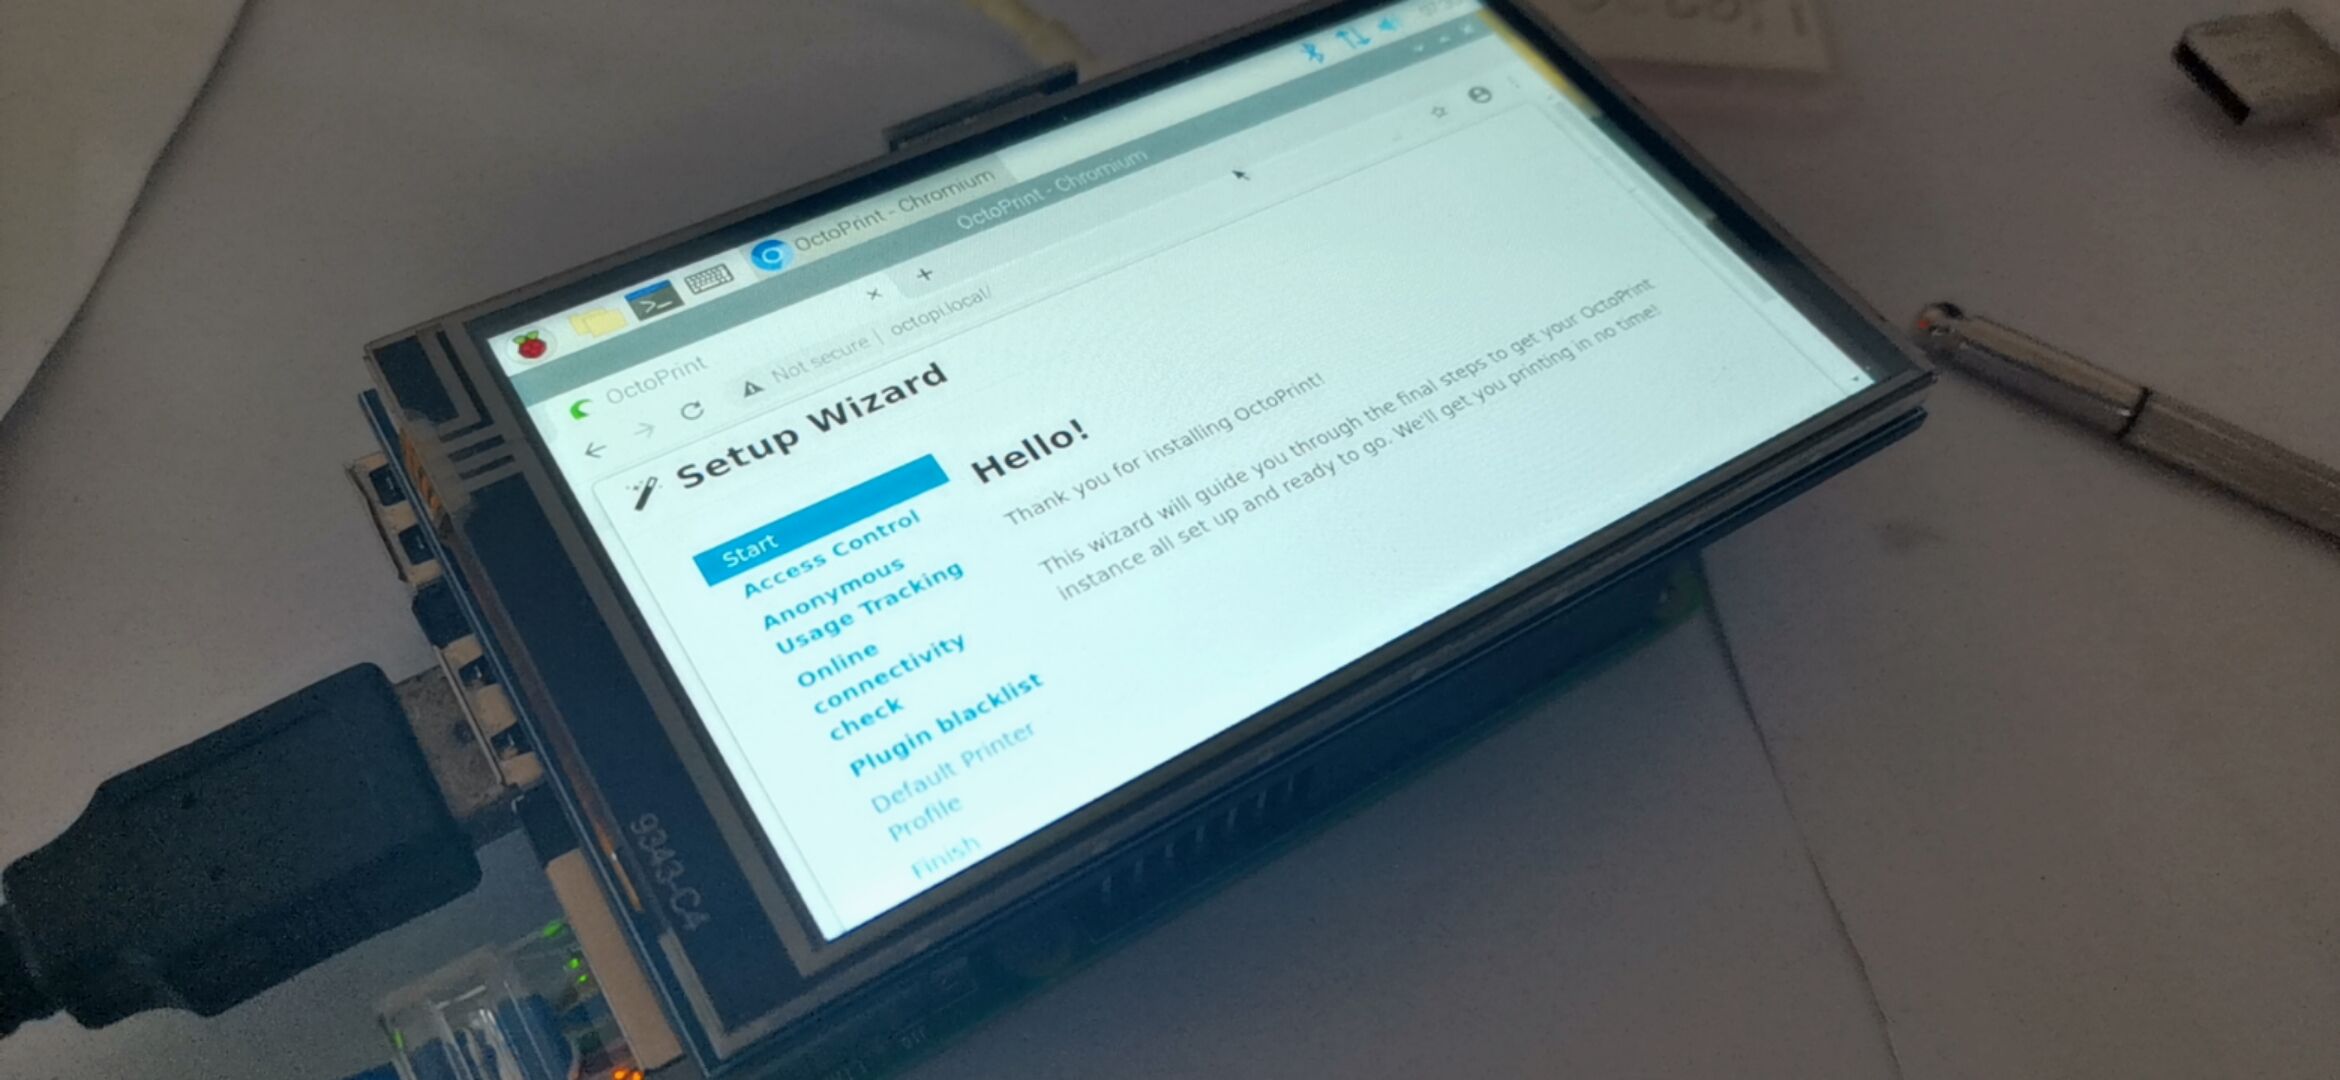
1. OctoPi system Instructions for use (How to use it correctly):
2. After installing the official Raspbian system, you can refer to the separate installation of the touch driver Instructions (only for Raspbian systems):
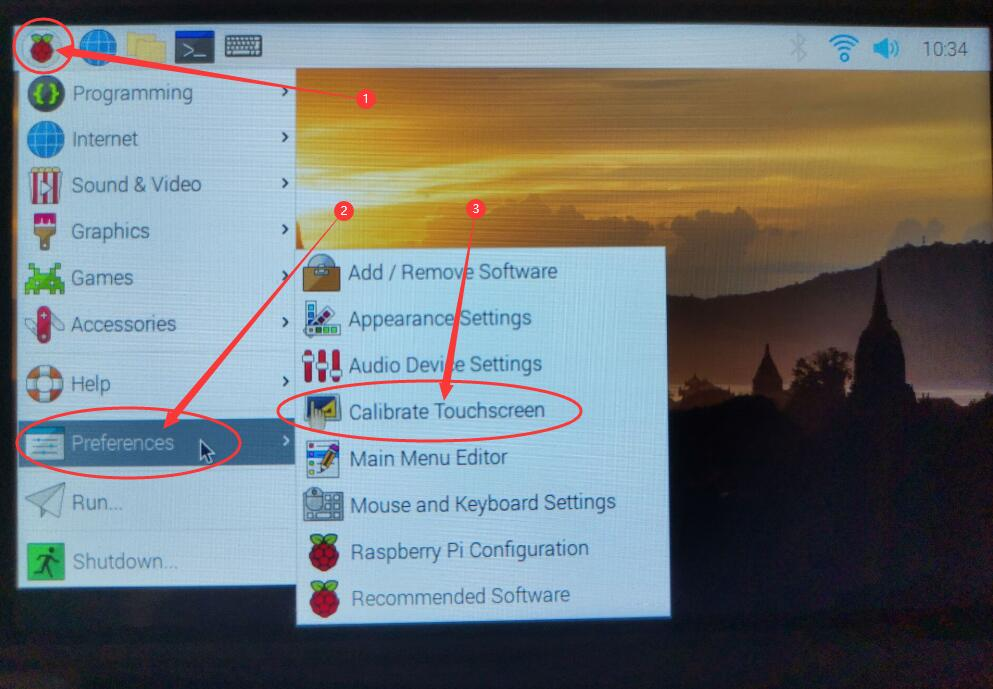
3. Method to adjust screen touch accuracy:
Select Start Menu --> Preferences -->Calibrate Touchscreen
4. Uninstall the touch driver tutorial
Enter the following command in the Terminal program
Notice:
After uninstalling the touch driver, it is recommended to connect the Raspberry Pi to the large screen to reset the system recognition resolution setting
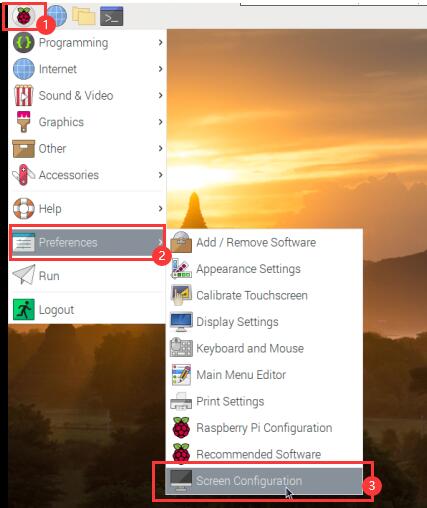
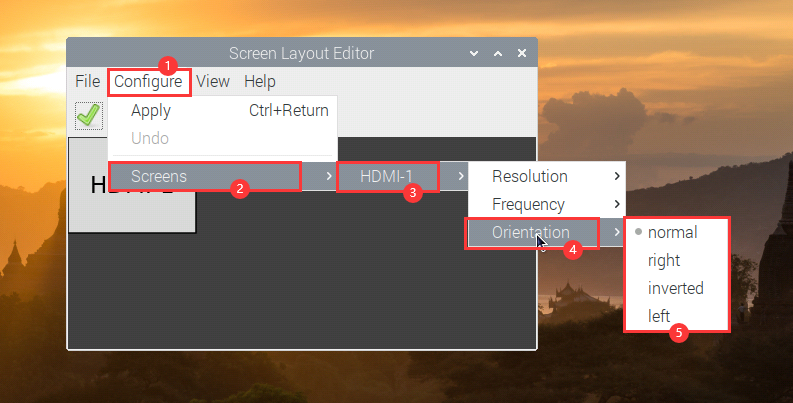
5. How to rotate the display direction
Select Start Menu --> Preferences -->Screen Configuration
Select Configure -- >Screens --> HDMI-1 --> Orientation --> Choose the direction you need.
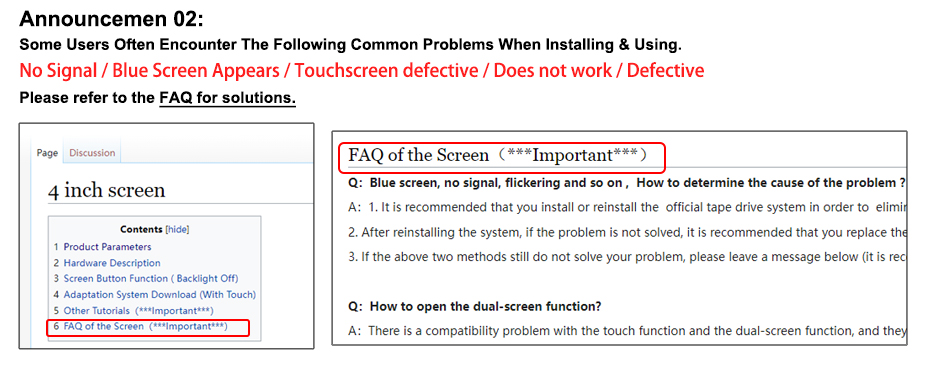
FAQ of the Screen(*Important*)
Q:The screen flashes between black and blue / screen does not detect inputs/ Does not work / defective
Because the products pass 100% full inspection before leaving the factory, except for obvious damage caused by external forces during transportation, the hardware will not have problems in general.
Reason of Problem:
A: The hardware connection is incorrect and there is no signal input.
B:The system file is installed incorrectly and cannot be parsed.
Solution:
A: First check whether each hardware connection is inserted and connected correctly. Inspection site: Raspberry Pi GPIO port connection position/HDMI connector/Raspberry pi power connector
B: After checking the hardware connection failure, it is not displayed normally. Please reinstall the system files we provide.
Use the image of the driver preinstalled
1) Download the driver image file from the website:
Raspbian: https://tinyurl.com/y3xsemve
Kali: https://tinyurl.com/y3hvzc6p
Octopi: https://tinyurl.com/y48ydar9
Ubuntu: https://tinyurl.com/nb7be2e8
2) Format Micro SD card by SD Formatter software.
3) Burn the official image into Micro SD card by using BalenaEtcher software.
4) Insert Micro SD card, connect LCD, start Raspberry Pi, and it will work normally.
System installation guidance video : https://youtu.be/29yw9LO06uc
Q:Touchscreen defective Important:(This method is feasible only for Rasbain system)
If you have difficulty installing the driver, or if you still can't use the display properly after installing the driver,
Please refer to the solution of the above question (Try our Configned images for tested)
Just need download and write the image into the Micro SD card. DO NOT need any driver installation steps.
Reason of Problem:
A: The Raspbain official system has been installed, but the touch driver file we provided is not installed
B:Incorrect format or command entered during operation(please note case of letters, spaces and special symbols)
Solution
Step 1 : Install the latest official images of various systems
(1) Download from the official website
Raspbian:https://www.raspberrypi.com/software/
(2) Format Micro SD card by SD Formatter
(3) Burn the official image into Micro SD card by using BalenaEtcher software
Step 2: Connect to Raspberry Pi
As shown in the figure, connect the LCD module to the Raspberry Pi
Step 3:Install the LCD driver
Method A: offline installation
Download from the web site or copy the "lcd-show.tar.gz" drive from the CD-ROM to the root
1)directory of the Raspberry Pi system card;
(Suggestion: copy flash driver directly to Micro SD card after completion of Step 1)
2) Unzip and extract drive files as the following command :
Run the following command line
| cd /boot
sudo tar zxvf LCD-show.tar.gz cd LCD-show/ sudo ./MPI4008-show |
3) Wait for a moment after executing, you can use the LCD.
Method B: online installation
Install drivers in the Raspbian system (Raspberry Pi requires Internet connection)
(1) Log on to the Raspberry Pi by Putty SSH (User: pi; Password: raspberry)
(2) Execute the following command (copy and paste it by right-clicking on the Putty window):
| sudo rm -rf LCD-show
git clone https://github.com/goodtft/LCD-show.git chmod -R 755 LCD-show cd LCD-show/ sudo ./MPI4008-show |
Tips: Please note case of letters, spaces and special symbols
Step 4:Check whether the driver is installed successfully
After the installation of the LCD driver is completed, the system will restart automatically. If the LCD can be normally displayed and touched, the installation of the driver is successful.
B: Not support install the driver in Ubuntu / Kali /Octopi system directly,please refer to the following tutorial.
Kali: http://tinyurl.com/y3hvzc6p
Octopi: http://tinyurl.com/y48ydar9
Ubuntu: https://tinyurl.com/nb7be2e8
Q:How to open the dual-screen function?
A:There is a compatibility problem with the touch function and the dual-screen function, and they cann't open at the same time.
It is recommended that you refer to the above method of uninstalling the driver(Refer to above : Other Tutorials) or reinstalling the system without touch driver provided by the official Raspbian.
If you have any questions, please contact:3356332511@qq.com



Enable comment auto-refresher
Anonymous user #1
Permalink |
Qianyanzhizao
Anonymous user #1
Permalink |
Anonymous user #1
Permalink |
Anonymous user #1
Permalink |
Anonymous user #1
Permalink |
Anonymous user #1
Permalink |
Anonymous user #1
Permalink |
Anonymous user #1
Permalink |
Anonymous user #1
Permalink |
Anonymous user #1
Permalink |
Anonymous user #1
Permalink |